5. Install Codefresh CLI
The Codefresh command-line tool, codefresh, allows you to manage your Codefresh deployments from your terminal
Installing the Codefresh CLI
Find your version by looking at the latest releases.
At the terminal command prompt, enter the following commands to download the CLI locally:
cd /tmp
wget https://github.com/codefresh-io/cli-v2/releases/latest/download/cf-linux-amd64.tar.gz
tar zxvf cf-linux-amd64.tar.gz
To will install
cfin your Cloud9 environmentchmod +x ./cf-linux-amd64 sudo mv ./cf-linux-amd64 /usr/local/bin/cfTo validate the command is installed properly:
cf version
You should see the codefresh version message.
Connecting your CLI with your Codefresh account
To connect your Codefresh CLi with your own account you need to setup authentication.
Sign in Codefresh and visit your user settings at https://g.codefresh.io/user/settings
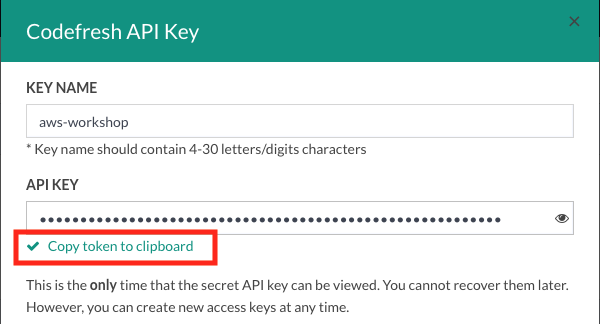
Scroll down until the API Keys section and click the Generate button

Enter an arbitrary key name (for example
aws-workshop) and enable the first checkbox next to Scopes.Finally click the Create button in the dialog and make sure to copy the API Token that was generated (it will not be visible again after you leave this screen)
In your terminal enter the following:
cf config create-context codefresh --api-key <your_key_here>Now the CLI is authenticated against your Codefresh account. You can verify the authentication with the following command:
cf get context