Build Container
Applications that are destined for a Kubernetes cluster, need to be packaged in a Docker container first. We will setup an automated pipeline that does the following
- Checks out the source code from Git
- Builds a Docker image with the source code
- Stores the Docker image in a registry (Dockerhub in our case)
This is the pipeline that we will create:
Fork the sample application
First fork the example application so that it resized in your own Github account:
Go to https://github.com/codefresh-contrib/aws-workshop-demos and click on the fork button.

Wait a bit until Github says that the fork is finished.
Create a Codefresh project
Codefresh pipelines are grouped under projects. Project names can be anything you want with the most common example being the name of an application where all pipelines in the project are packaging/deploying the different microservices. You can think of projects as “folders/directories” for your pipelines.
Log into Codefresh and navigate to Projects on the left sidebar. Then click on the New project button on the top right corner to get started.
Enter a name for your project (e.g. my-first-project) and choose a sample icon that you like. Leave the Project tags field empty.
Click Create button once you are done. You now have a new project and can start adding pipelines.
Create a new pipeline
Click the New pipeline button in order to create a pipeline. Enter any name (e.g. basic-build).
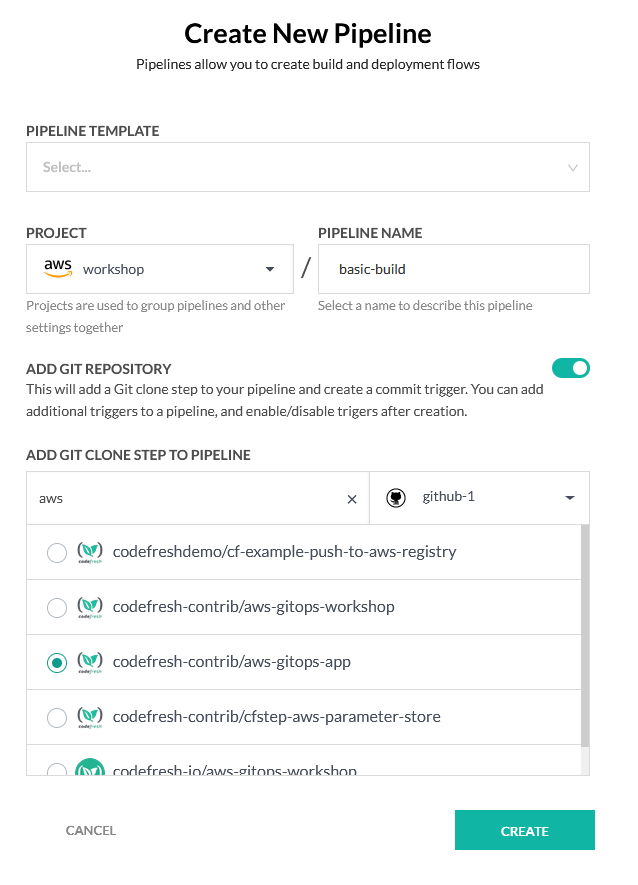
Find your repository from the list and select it. Make sure that the option Add Git commit trigger is selected. This way your pipeline will be automatically launched when a commit happens on this repository.
Click Create button. Your pipeline was created and you should now see the pipeline editor. Here you can describe what the pipeline will do using Codefresh YAML.
Build the docker image
Codefresh has already created a sample pipeline which we will not use for this tutorial. You will create a very simple pipeline that checks out the source code and builds a docker image.
Delete the existing contents on the editor and paste the following:
version: '1.0'
stages:
  - checkout
  - package
  - verify
steps:
  main_clone:
    title: Cloning main repository...
    type: git-clone
    repo: '${{CF_REPO_OWNER}}/${{CF_REPO_NAME}}'
    revision: '${{CF_REVISION}}'
    stage: checkout
  build_my_image:
    title: Building Docker Image
    type: build
    stage: package
    image_name: <your docker username>/my-app-image
    working_directory: ./simple-java-app
    tags:
    - "${{CF_SHORT_REVISION}}"
    - latest
    dockerfile: Dockerfile
    registry: dockerhub
Remember to replace <your docker username> with your own Dockerhub username. Notice also the registry property that tells Codefresh where to push the image after it is built. This is the name of the Dockerhub integration that we setup in the previous section (“Connect Registry”).
This pipeline contains just two steps
git-clone step for checking out the code. The clone step is using some built-in pipeline variables. They instruct the pipeline to checkout the exact code that is described from the commit of the trigger
build step for building the docker image AND pushing it to the connected Docker registry. The build step uses a Dockerfile that is located at the root folder of the project and creates a Docker image with a tag same as the hash of the Git commit
Click Save button to apply your changes. Then click Run button to start your pipeline. On the dialog that will appear leave the default selections.
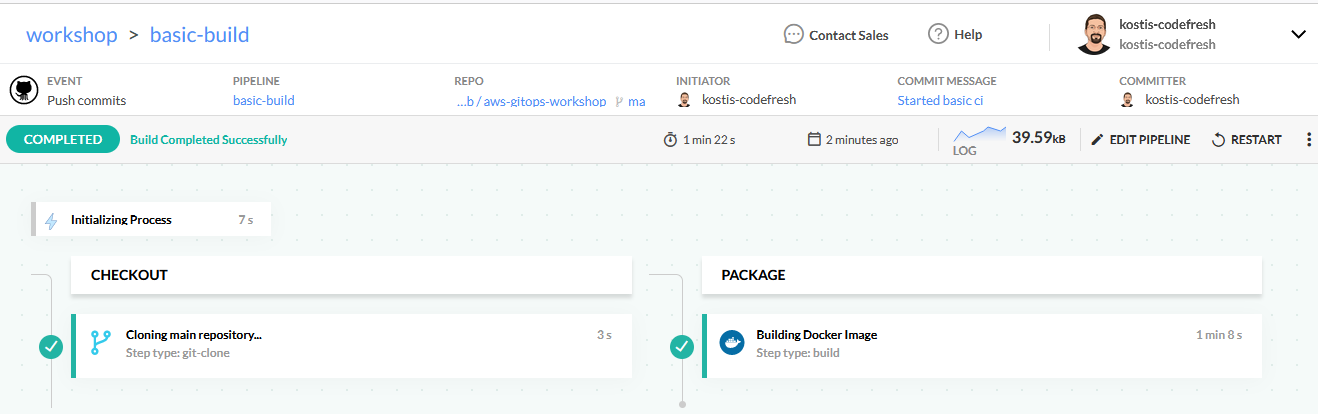
Running the pipeline
Once the build is started Codefresh will navigate you to the build progress of the sample application.
You can click on any step and see its logs.
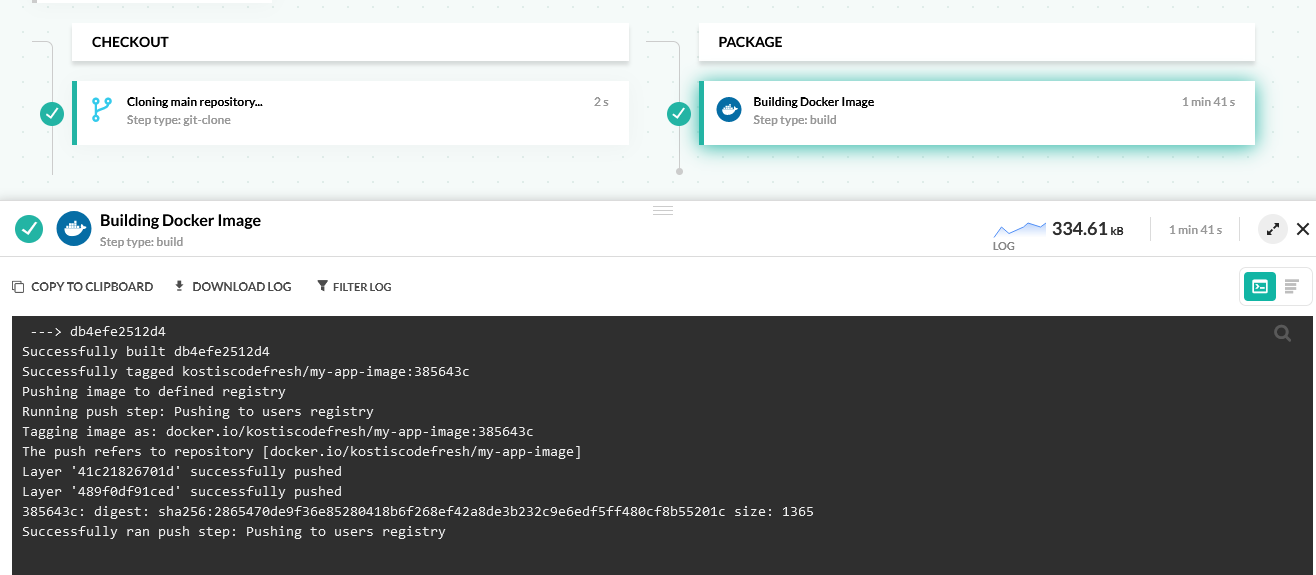
The Codefresh build step both builds and pushes the image to the registry. Even though Codefresh has a separate push step (for pushing an existing image to a container registry), it is completely optional.
The first time the pipeline runs, Codefresh will download all dependencies of the application. Every subsequent run will be much faster as the pipeline cache will take effect.
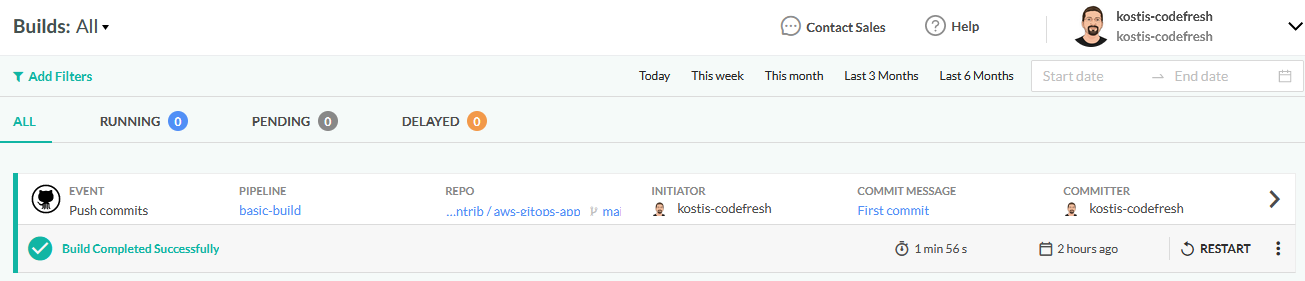
After a while the build should finish with success. All previous runs are in the Builds page from now on and are accessible by clicking on Builds in the left sidebar.
Inspecting your Docker image
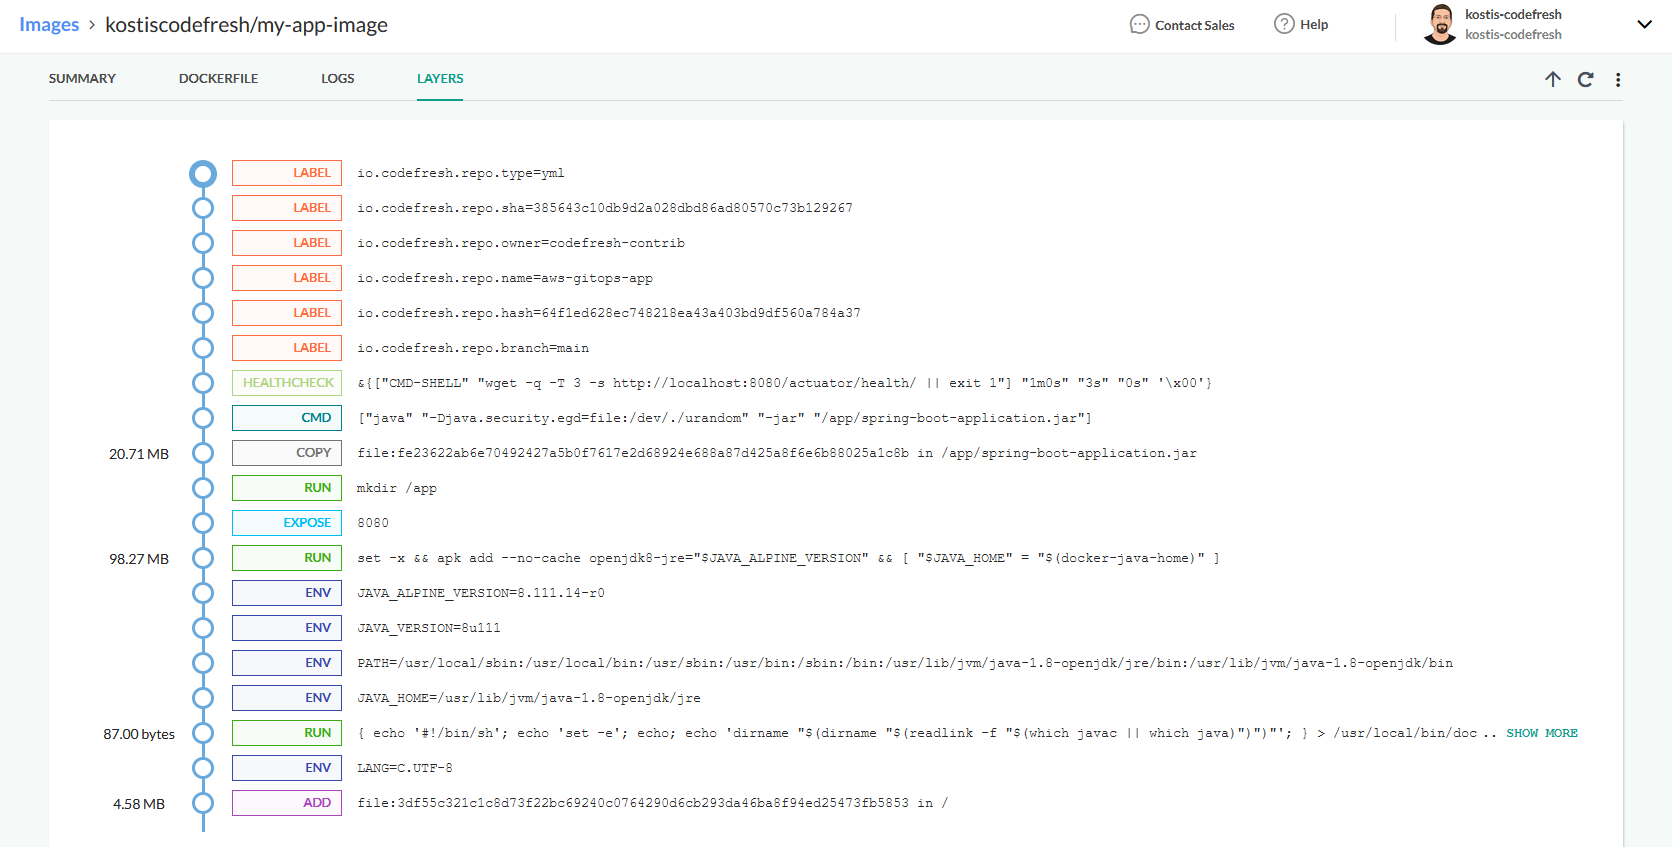
With a successful run of the pipeline you will be able to see your created image in the images dashboard accessible by clicking on Images on the left sidebar.

You can click on the row of the image and see additional details and metadata of the image. Feel free to explore the tabs at the top for more information.
The layers tab shows how the image was created and which files/layers contribute to its total size.
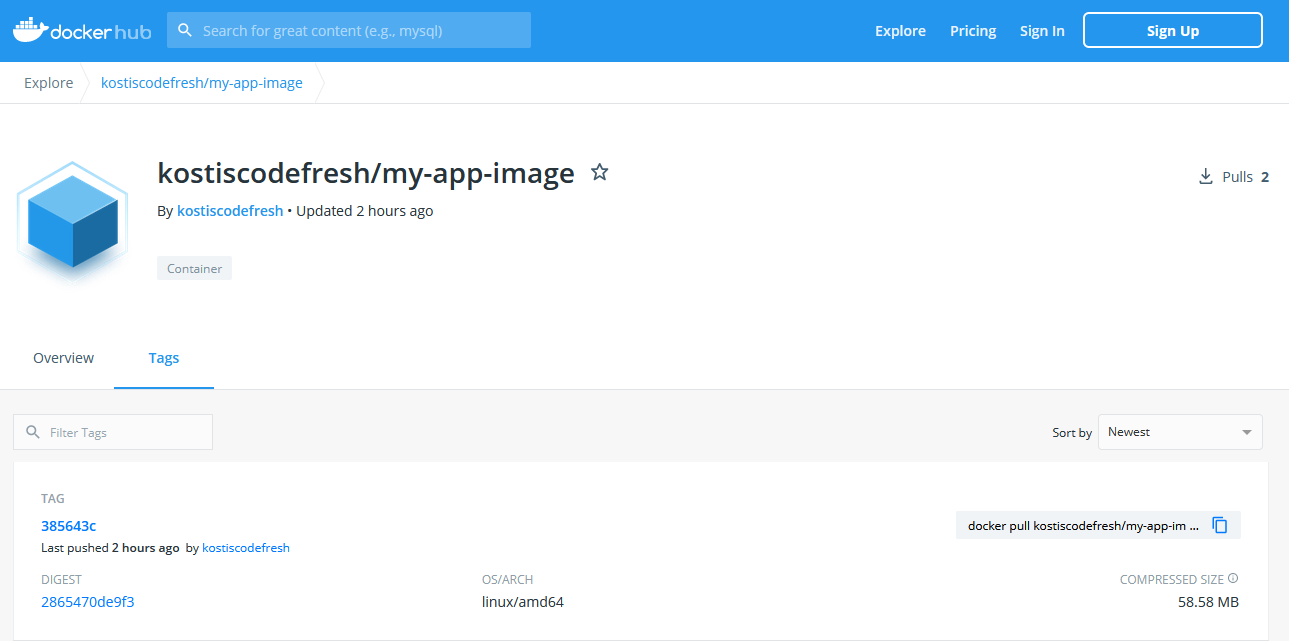
Since we used Dockerhub as a registry, you can also find the same image in the Dockerhub UI at https://hub.docker.com/r/<your dockerhub id>/my-app-image/tags.
We now have a container image created in a fully automated way. Every time you perform a commit in the source code, Codefresh will run the pipeline again creating another tag with the new Git hash.